Semalt: How To Verify Google Search Console?
As the owner of a website, you have certainly heard the name 'Google Search Console' more than once. You probably know that it is worth connecting your website with this tool and that it helps in website positioning. Okay, but how to verify the GSC on the website? With Semalt, learn everything you need to know about website ownership verification in Search Console in this post!
What is Google Search Console?
Google Search Console is a free tool created by Google, necessary in the work of positioning pages or internet marketing. The most important functions of the SC are:
- the ability to monitor and compare data from organic traffic,
- page indexing (including errors appearing on the website in the desktop and mobile versions),
- controlling the number and quality of both internal and external links.
On our blog, you will find a detailed definition of Search Console and a comprehensive guide to Google Search Console. If you have never had contact with this tool before, start with this post! There you will find detailed descriptions of the most important functions that SC has, and you will also learn how to read individual data about your website.
However, in this post I will focus on verifying the ownership of the site with the tool - when is it best to do it and what methods of verification exist.
Why should you use GSC and when to connect it to your website?
Search Console is a practical and very intuitive tool. You do not need to be familiar with programming to successfully use its capabilities. Thanks to the analysis of the data provided by SC, you can monitor the organic traffic on your website on an ongoing basis, e.g. sudden drops caused by algorithm changes or the indexing status of the page.
Google Search Console collects data for analysis from 16 months back. Therefore, the answer to the question "When to connect Google Search Console to the website?" sounds like: as soon as possible! So right after the implementation of the site☺, SC, similar to Google Analytics, which is another useful tool that you should also immediately implement on the site, collects data based on the tracking code.
It is worth verifying the ownership of the website with the tool as soon as possible, even in the case when you do not want to focus on positioning the website at the moment. SC will collect data, and when you decide to do SEO, you will have a lot of data to analyze. So don't wait and verify your site right after reading my post!
How to verify Google Search Console?
First, let's see what verification is.
What is Verification?
Verification is a necessary process and you must follow a few simple steps to prove that you are the owner of the website. When sharing data on the indexing status of a website, Google must be sure that it will reach the real owner of the website. You must have ownership verification to access this information. Every service in GSC must have at least one verified owner. Just a few days after verification, the Search Console should start showing data about the website. Verification issues typically do not interrupt data collection.
How long is verification valid?
From time to time, Google checks if the verification is still valid, e.g., through the HTML verification tag on the page. If verification cannot be confirmed, site permissions will expire after the grace period. Once all verified owners lose access to a service, designated owners (by verified owners), users, and related services will also lose those rights.
Verification methods
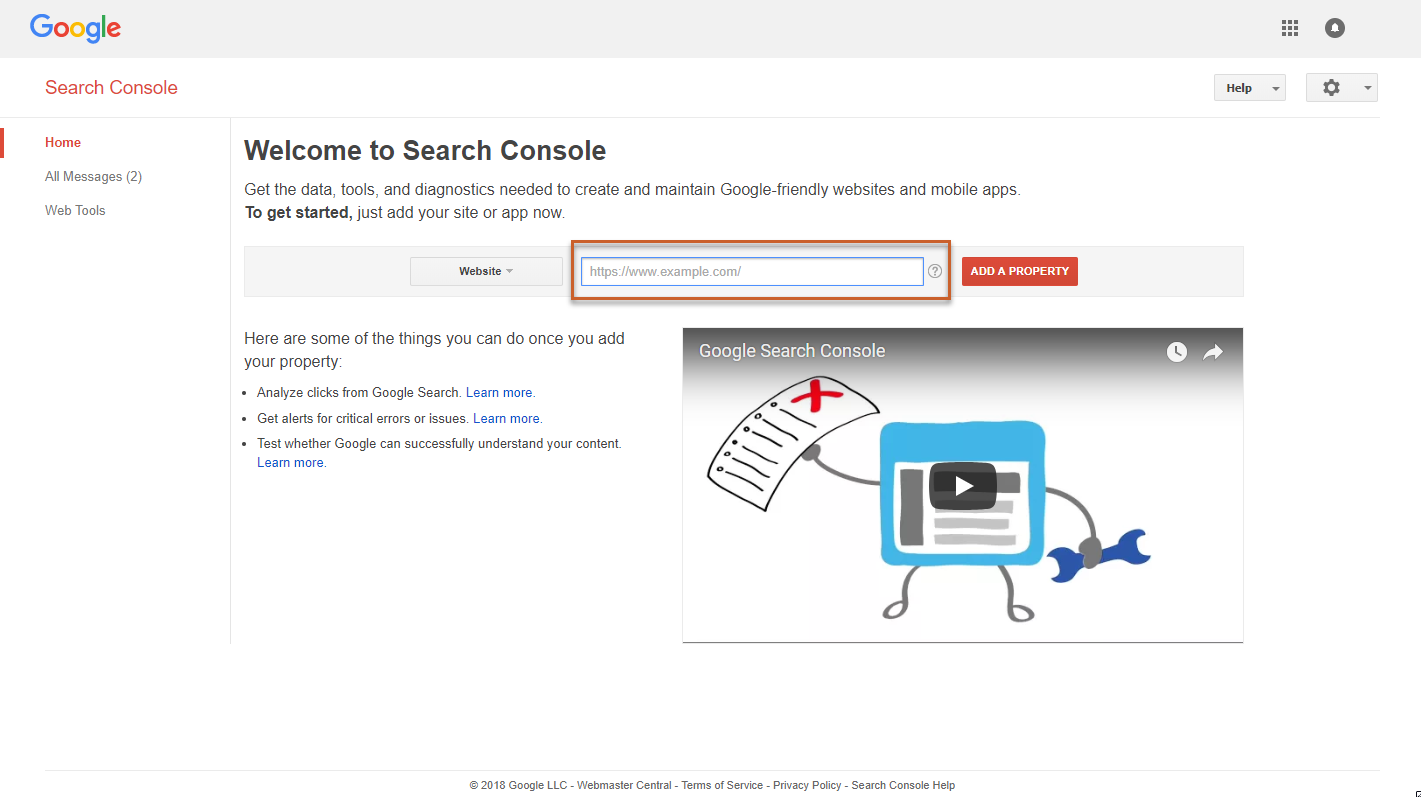
There are several methods of verifying your site with GSC. Below, I describe what each of them is about. To be able to verify a site in SC, you must first add a site service to the tool. To add a property to the Google Search Console, you must have an active Google account. Go to https://search.google.com/search-console/welcome and click "Add a new service" in the top left corner. Next, you have to decide whether you choose a domain service or a service with a URL prefix, as for Google the HTTPS site and HTTP are two different pages. The domain service will cover all subdomains and multiple protocols and is therefore recommended.
After entering your website name and moving on, you'll have several verification methods to choose from. Choose from the available options and follow the directions. Not every method is available for all services. SC will show you a list of available verification methods for your service along with the recommended methods.
- HTML file upload
One method of verifying your site ownership in GSC is to upload a special HTML file to your site. This file is associated with a specific user. The HTML file must be downloaded and then uploaded to your website. After uploading the file, click "Verify" in the SC tool. To keep ownership verified, do not delete the file even after successful verification.
- HTML tag
You can also confirm site ownership using a special Meta tag. This is a very simple method. All you have to do is copy the Meta tag provided in GSC and paste it on the home page. This tag should appear in the <head> section before the first <body> section. After you've pasted the <Meta> tag into the HTML on your website, click "Verify". To keep ownership verified, please don't remove the Meta tag from your site.
- Google Analytics tracking code
If you have added the Google Analytics tracking code on your website, you can verify it with the GA tracking code. To do this, you need to edit permission on the web service whose tracking code is used by this website. To verify site ownership in SC, the tracking code must contain the analytics.js or gtag.js snippet. Place this code in the <head> section of the page. Use the code exactly as provided. You cannot modify the code or the verification will fail. Furthermore, other administrators of your GA accounts will be able to access your site data in the Search Console. Besides, the Google Analytics tracking code is only used for ownership verification as it does not provide access to GA data.
- Google tag manager
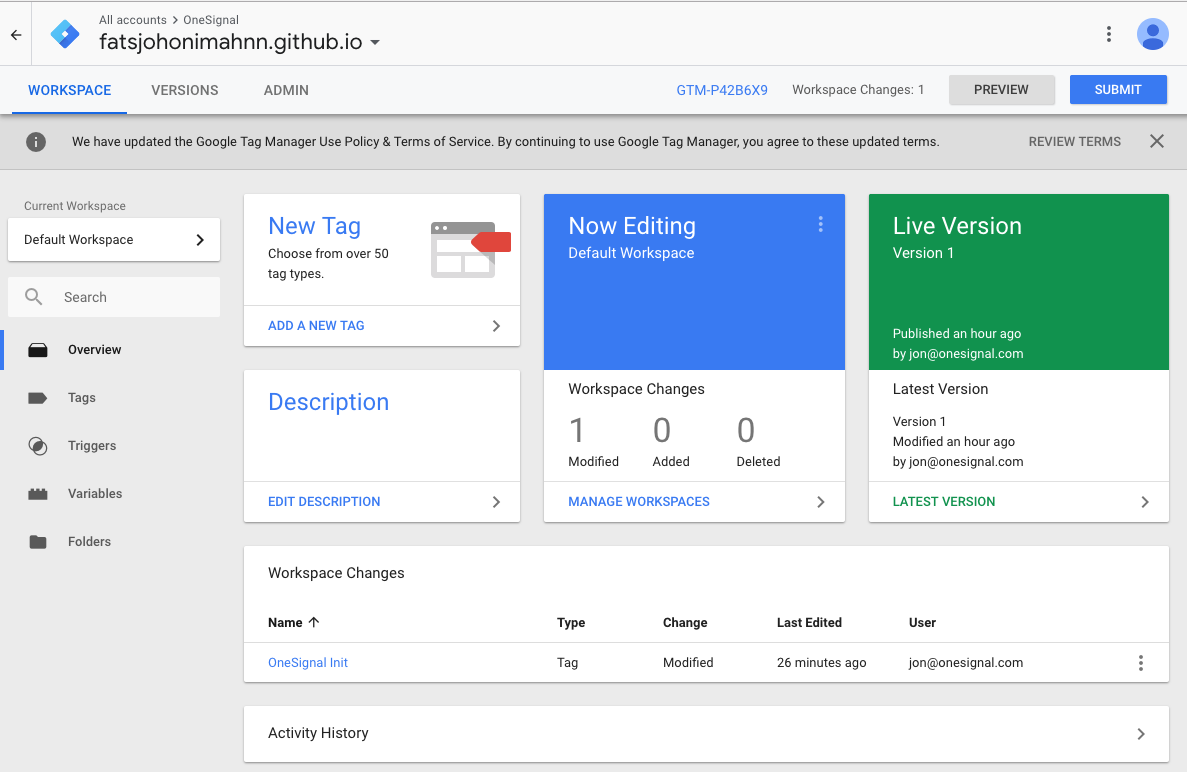
This verification method is possible as long as you have a Google 'Tag Manager' account and have permissions to publish in the Google Tag Manager container on the page. To verify site ownership, place the <noscript> Tag Manager code immediately after the opening <body> page tag. Do not insert a data layer (or anything else except HTML comments) between the <body> tag and Tag Manager code. Use the exact form of the code as provided. If you change the code or fail to execute any of the commands, verification will fail. The Google Tag Manager container ID is only used to verify site ownership. Google Tag Manager Data will not be shared.
- DNS Record - Domain Name Provider
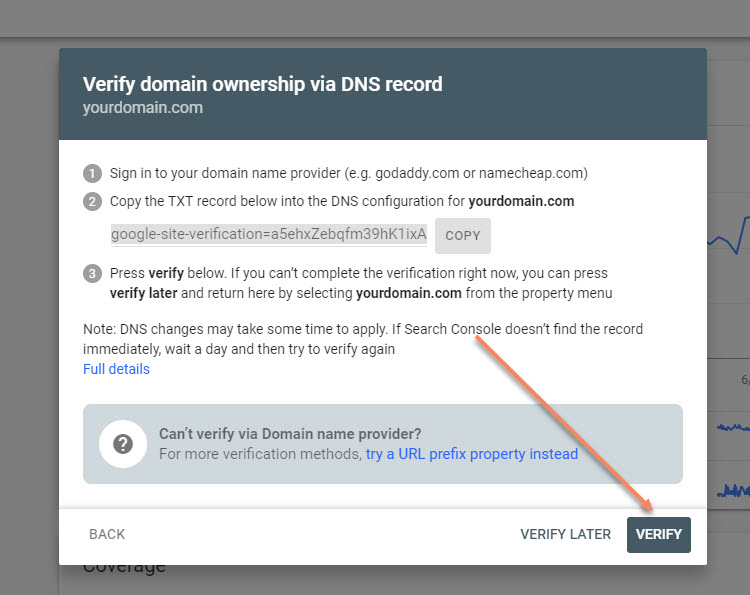
Site ownership can also be demonstrated at the domain level by adding a DNS record with the domain name provider. To use this verification method, you will need to log in with your domain provider (e.g., godaddy.com or namecheap.com). Then copy the TXT record (listed on the GSC Ownership Verification page) to your domain's DNS configuration. Once done, hit "Verify". Google will check that your record exists and is assigned to your domain. Each DNS record assigns a selected user to the appropriate domain. It's good to know that making changes to DNS can take a while. If the Search Console doesn't find the record right away, try verification the next day.
The above methods are the most popular methods of verifying page ownership in GSC. Other methods you can use include Google Sites, Blogger, and Google Domains.
What errors may appear during GSC verification?
When performing site ownership verification, the following errors may appear:
- Invalid tag/fragment/errors related to files - if you modify the code or file specified in verification and add it in a different form to the page, the verification will fail.
- The connection to the server has timed out - this may mean that the server is down or is busy and responding slowly. If you see this error, check whether the server is responding and try again.
- There was an error checking the domain name - it's a DNS server error. Possible causes of this error are a server failure or a problem with DNS routing to your domain. Check that the domain is recognized correctly and try again.
- Your download request has been redirected too many times - if you are seeing this error, please check the URL for issues.
- The server returned an invalid response - оccurs when the site cannot be accessed, such as when it requires password authentication.
- Connection to the server was impossible - check that the server is not turned off and the domain is correctly recognized.
- An internal error has occurred - if this error keeps showing up, check the Webmaster Center help forum.
- Time limit expired - check that the site is available and try again.
- Your domain could not be found- check whether you are entering the correct URL since it is not recognized by the DNS service.
Summary
You already know that Google Search Console is an extremely useful tool that makes monitoring the indexing status of the website and organic traffic very easy. If so far the obstacle in using GSC has been the verification of website ownership, I hope that this post has cleared your doubts and you already know that it is not difficult. If you have any questions regarding the verification of the site in SC or need help during the verification, feel free to ask questions in the comments under the post or to join Semalt Help Center to help you☺ Good luck!
FAQ
1. What is Google Search Console?
Google Search Console is a completely free tool from Google created for website administrators. It is especially useful for people dealing with SEO and internet marketing. It allows you to monitor, among other organic traffic on the site, site indexing status, and the number and quality of internal and external links.
2. What data can I read from Google Search Console?
Google Search Console has many practical functions. The tool allows you to analyze data such as page views in the search engine, organic traffic, average CTR, and the average position of phrases. Also, you can check with which key phrases the website is displayed and which subpages generate traffic. SC also allows you to check the page indexing status and errors that occur both in the mobile version and on computers. The tool will also tell you if your website has been fined by a Google penalty.
3. How to add a site sitemap to the Google Search Console?
To add a site sitemap to Google Search Console, go to "Sitemaps", enter the sitemap address and click "Submit". The submitted sitemap will appear in the table below. It can take up to several days for all URLs contained in the sitemap to be uploaded.